How To Turn A Bathtub Into A Planter?
The idea of repurposing a once-functional bathtub into a decorative planter is appealing for several reasons. An old clawfoot tub or modern soaking tub takes up considerable space, so finding another use for it is practical. Bathtub planters also have a quirky, conversation-starting quality when positioned in an outdoor living area. Additionally, the durable construction of most bathtubs makes them ideal for containing and protecting plants.
Converting a bathtub requires some power tools, paint, and elbow grease, but the process is straightforward. The key steps include cleaning and prepping the tub, cutting drainage holes, painting and sealing, creating drainage and planting. With the right materials and safety precautions, you can turn a castoff into a beautiful bathtub planter.
How to Turn a Bathtub into a Planter?
The bathtub should be filled with a commercial soilless potting mix made for containers. Fill the tub to about 2 inches below the rim, leaving room for mulch. Then plant your chosen flowers, herbs, veggies or small shrubs in the tub, spacing them appropriately. Be sure the plants selected are suited to container gardening.
What Tools do you need?
The basic materials needed for turning a bathtub into a planter include:
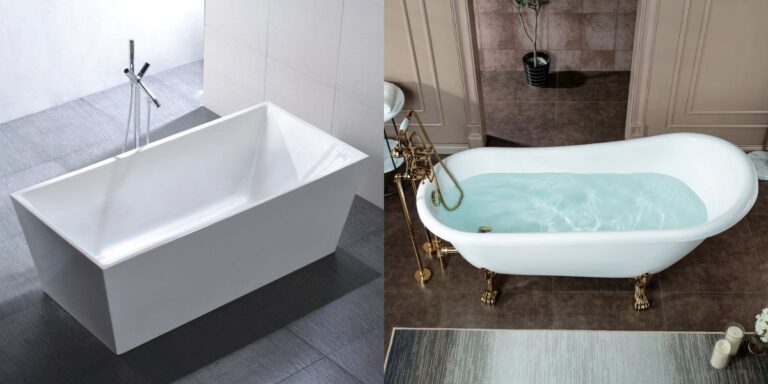
- Bathtub – Cast iron, porcelain, acrylic or another durable material that can withstand outdoor elements. Measure to ensure it will fit the space.
- Drill and hole saw or jigsaw – For cutting drainage holes in the bottom of the tub.
- Drop cloth – For protecting floors when cutting and painting.
- Sandpaper – For smoothing rough edges after cutting. 60–100 grit is ideal.
- Paint and primer – Outdoor enamel or other weatherproof paint.
- Soil – Potting mix suitable for containers.
- Plants – Chosen based on tub location (sun/shade).
Other helpful materials include painters tape, sealant, gravel or stones for drainage, landscape fabric, moss, and decor stones. Make sure you have all the materials on hand before starting the bathtub conversion.
What Type of Bathtub is Best?
Cast iron and acrylic bathtubs are preferred for outdoor use because they are durable, weatherproof materials. Porcelain enamel over steel tubs can also work well. Fiberglass bathtubs may deteriorate more quickly outside. Take into account the size, weight, and material of the tub before undertaking this project.
How do I cut drainage holes?
The key tools for cutting drainage holes are a drill with a hole saw attachment or a jigsaw. Wear protective eyewear when cutting. Measure and mark the hole locations in the bottom of the empty tub. For stability, place the tub upside down on a drop cloth. Drill a pilot hole first with a smaller bit. Use a 2-3 inch hole saw or jigsaw to cut the main holes. Cut several holes to allow for adequate drainage.
Paint and Sealant Options
Outdoor enamel or exterior latex paint is ideal for painting bathtub planters, along with an enamel primer. For extra protection, apply a clear enamel sealant after painting. Test paint swatches first to get the desired color.
Preparing the Bathtub
Proper prep is crucial before painting and planting your bathtub garden. Follow these steps:
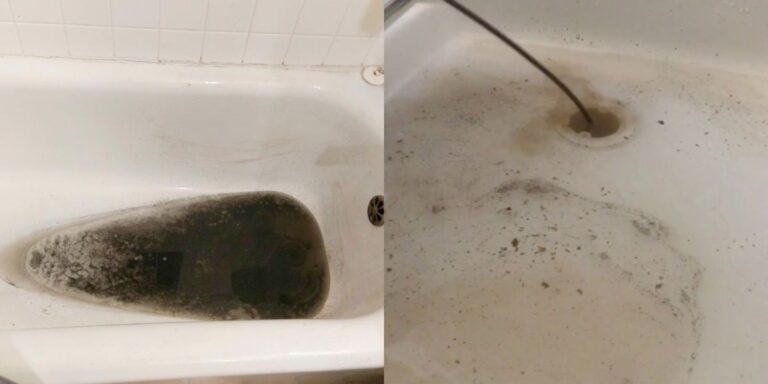
- Clean the tub thoroughly with an abrasive cleaner until all the residue is gone. Disinfect with a bleach solution. Rinse well.
- Position the empty tub upside down on a drop cloth. Mark and cut 2-3 inch drainage holes using a hole saw drill bit or jigsaw. Wear safety goggles.
- Use 60-100 grit sandpaper to smooth and round any rough edges around the drainage holes. This protects plants from being scratched.
- Wipe away all dust from sanding. Tape off the bath fixtures with painter’s tape if not removing them.
Thorough cleaning removes soap scum, oils and dirt so paint adheres well. Adding drainage holes is necessary for water to flow out. Sanding prevents snagging and makes the tub surface paint-ready.
Bathtub Cleaning Tips
For heavy grime, let a paste of baking soda and water sit on the tub overnight before scrubbing. Use household abrasive cleaner and a stiff scrub brush until the tub is sparkling clean. Disinfect with a 10:1 water to bleach solution to kill mold and bacteria.
Where to Position Drainage Holes
Mark drainage holes in the bottom corners of the tub, around 6 inches from the walls. This allows water flow without compromising the planting space too much. Add 2-3 more holes spaced evenly for good drainage. The holes can be disguised later with gravel or plants.
Sandpaper Grit Recommendations
Use 60-100 grit sandpaper for best results when smoothing cast iron, porcelain or acrylic. Start with 60 grit to remove bulk, then 80 or 100 grit for final smoothing. Don’t use anything finer than 150 grit, as the tub needs texture for paint adhesion.
Painting and Sealing
Applying a fresh coat of weatherproof paint allows your bathtub planter to coordinate with outdoor décor. Follow these steps:
- Wipe away dust, then apply 1-2 coats of outdoor primer, allowing drying time between coats.
- Add 2-3 thin coats of outdoor enamel or latex paint in your chosen color. Allow to dry fully.
- Seal with 2 coats of clear outdoor sealant for extra protection and sheen.
Proper prep leads to a smooth, durable painted surface. Thin layers of paint prevent dripping. Top sealing gives a glossy finish and prevents chipping over time.
Primer Recommendations
For cast iron, use a dedicated tub and tile enamel primer. On porcelain, acrylic or fiberglass, an exterior latex primer bonds well. Apply in thin coats so the primer doesn’t pool in the tub crevices.
How Many Paint Coats?
Two to three thin coats of outdoor enamel paint creates a vibrant color and durable finish. Allow each coat to dry fully before adding another. Thick coats can cause dripping or pooling. Start with perimeter edges, then fill in the center.
Sealants for Protection
An outdoor polyurethane, epoxy or acrylic sealant protects painted bathtub planters. Clear enamel spray paint adds glossy protection. Reapply sealant every 2-3 years. Ensure products are formulated safe for plants.
Creating Drainage
Proper drainage prevents soil and roots from becoming waterlogged. Here are tips:
- Add a 2-4 inch layer of pea gravel, marbles or stones in the bottom of the tub to aid drainage.
- Cover the gravel with landscape fabric or plastic window screen to prevent soil from filtering down.
- Fill the remaining tub with a lightweight, porous container planting mix.
- Add activated charcoal to soil to help absorb odors and reduce mold.
The gravel layer allows water to flow out while the fabric keeps soil and roots separated. Well-draining soil is essential for healthy plants.
Gravel Needs
For a standard bathtub, pour in 2-4 inches of pea gravel to cover the bottom. In a large tub, up to 5 inches could be needed. Smaller gravel types work better than large rocks for dispersing water.
Barriers Over Gravel
Plastic window screen or breathable landscape fabric prevents soil from settling into the gravel layer. This separation keeps the gravel drainage channels clear. An old cotton sheet also works in a pinch.
Best Soils for Container Planting
Choose a commercial soilless mix formulated for containers, or make your own mix using one part potting soil, one part peat moss or compost, and one part perlite or bark chips. Good drainage is essential.
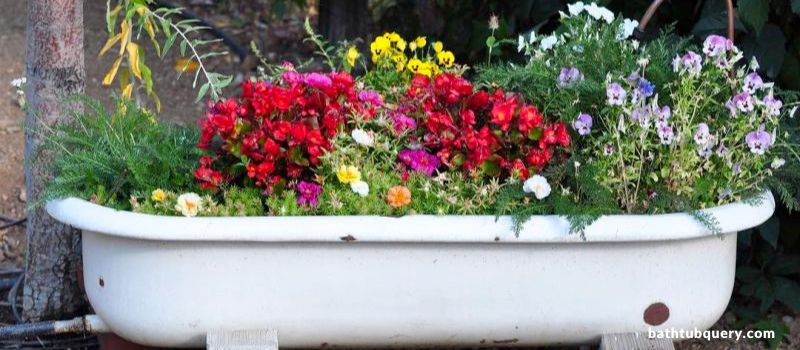
Planting and Decorating
When selecting plants, focus on varieties suitable for containers. Here are tips for planting and decorating your bathtub garden:
- Choose small shrubs, perennials, trailing vines or edible plants adapted to containers. Go for a mix of heights, textures and colors.
- Arrange plants attractively in the tub, using thrillers, fillers and spillers to create visual interest.
- Consider adding decor elements like pebbles, moss, driftwood or glass nuggets around planted areas.
- Use caution moving a planted bathtub into position, as it will be very heavy. Place it on a level surface before filling.
Get creative with ways to embellish your bathtub planter! statue2.png
Good Plant Choices
- Herbs like thyme, oregano, sage
- Annuals like petunias, pansies, snapdragons
- Trailing vines like ivy, wandering jew, sweet potato vine
- Small shrubs and perennials like lavender, agapanthus, grasses
- Salad greens, strawberries, veggies (in minimum 12” depth of soil)
- Succulents and cacti
Decorating Ideas
- Paint or stencil the exterior after planting
- Add stepping stones or pavers around the tub perimeter
- Install drip irrigation for easy watering
- Use decor items like garden gnomes, birdbaths, mirrors, candles
- Accent with containers of annuals or pots of succulents
- String lights or hang wind chimes above
Maintenance Tips
- Fertilize plants monthly during the growing season
- Prune and shape plants as needed
- Weed and remove dead plant material
- Repaint as necessary to cover chips and maintain appearance
- Reapply outdoor sealant every 2-3 years
- Empty, clean and refresh soil/plants annually
FAQs
How much weight can a bathtub planter hold?
Most standard bathtubs can hold 500-800 pounds when converted into a planter. Limit plant choices to smaller varieties and avoid overloading one area to prevent excessive weight.
What about drainage in a bathtub planter?
Drill 2-3 holes in the bottom for drainage. Add a layer of gravel, then landscape fabric before filling with soil. This allows water to drain out.
Do you need to waterproof a bathtub planter?
Yes, apply 2-3 coats of outdoor waterproof enamel paint after priming the tub. Top with a clear sealant for extra protection from weathering.
How do you keep bugs and pests out of a bathtub garden?
Use lightweight row cover fabric to keep out insect pests without harming plants. Adding beneficial nematodes also helps control soil-dwelling pests.
What can you plant in a cast iron bathtub?
Herbs, leafy greens, ornamental grasses, small shrubs, annuals, and trailing vines all grow well in cast iron tubs. Be sure the tub has good drainage.
Conclusion
Converting an old bathtub into a practical and whimsical planter is a DIY project suitable for crafty beginners or seasoned gardeners. With some sweat equity and imagination, you can upcycle an unused tub into a stunning backyard focal point. Be sure to select suitable plants, allow for drainage and decorate to your taste. Proper prep and care will keep your bathtub garden thriving for years of enjoyment.
For alternative ideas, consider using an old tub as a contained pond or fountain, or planting succulents or cacti for low maintenance. Let your bathtub planter reflect your personal style. The unusual conversation piece is sure to impress visitors and provide an abundance of gardening enjoyment.

Amanda has been designing and installing bathtubs for over 15 years. She first got interested in the bathtub industry while working as an interior designer right after college. During her years as a designer, Amanda was frustrated by the lack of high-quality, unique bathtub options for her clients. This passion led her to start her own bathtub website in 2009.