How to Remove a Cast Iron Bathtub Step-By-Step?
Below is the entire process of removing a cast iron bathtub step-by-step. We’ll cover all the basics from why you may want to remove your tub to prepping for the job, actually taking out the cast iron tub, and finishing up the space after removal. Let’s get started!
Why Removing a Cast Iron Bathtub?
There are several reasons why homeowners decide to remove their old cast iron tubs. If any of these scenarios sound familiar, then taking out your tub may be on your to-do list.
Updating Your Bathroom
Does your bathroom look straight out of the 1970s with its avocado green suit? You’re not alone – a lot of bathrooms are way overdue for a makeover. One of the best ways to update the look and feel of a bathroom is by replacing the old cast iron tub with something more modern and stylish.
I once renovated my parents’ primary bathroom which had the original cast iron tub installed in the 1950s. Though it still functionally worked, the dingy and outdated tub had to go to give the space a fresh new look. Out with the old, in with the new!
Damaged or Worn Out Tub
Over years of use, cast iron bathtubs can start to show their age through chips, cracks, rust stains, and more. If your tub is so damaged that it can’t be repaired or refinished, removal may be your only option.
I’ve seen some tubs with extensive rusting and corrosion on the underside or feet. Even large chips and cracks on the tub surface can mean it’s time to replace it. Water damage is no joke, so it’s not worth trying to salvage a seriously damaged tub.
Changing Bathtub Size or Style
Is your current cast iron tub too small, shallow, or narrow for your liking? Do you dream of a roomier soaking tub or even a jetted spa tub? Whatever the case may be, opting for a new bathtub style or size is a great reason to remove your existing cast iron tub.
For my own master bathroom remodel, I wanted to switch from a standard bathtub to a larger, deeper model for a more luxurious soaking experience. The old standard-sized cast iron tub just wasn’t going to cut it. Out it went to make room for the shower/tub combo of my dreams!
First, Prepare for Bathtub Removal
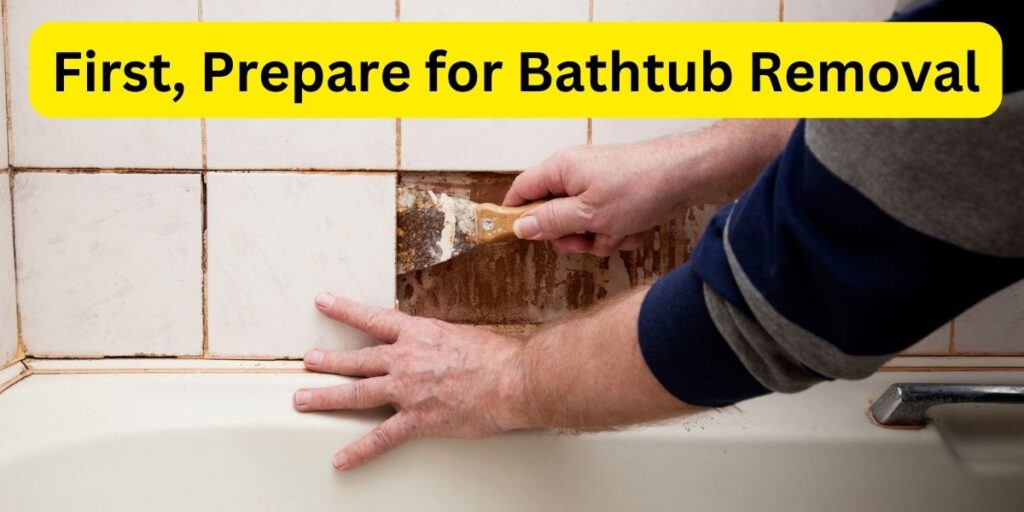
Taking out a bathtub, especially one made of heavy cast iron, is not a small endeavor. Proper preparation is key to having a smooth removal process. Here’s how to get your space ready beforehand:
Turn Off the Water Supply and Drain Pipes
Before you start prying away at your tub, it’s crucial to turn off the water supply. Locate the shut-off valves for the hot and cold water lines that feed into the tub faucet and turn them until they are fully closed. This prevents any water from spurting out when you remove the faucet and pipes.
You’ll also want to disconnect the drain assembly from below the floor. Be ready with a bucket to catch any water still left in the drain trap. Safety first!
Remove Fixtures and Accessories
Take off any fixtures attached to your cast iron tub, including faucet handles and the spout. You’ll need to access the plumbing anyway to remove the tub.
Also, take off any accessories like soap dishes, racks, or shelves built into the tub. You want the tub to be completely clear of any attached items.
Prepare the Room
Protect those floors! Cover them with a tarp or drop cloths so they are safe from falling debris and tools. You may also want to lay cardboard or plastic sheeting against the walls around the tub. This helps prevent any tub shards or supplies from damaging the surrounding surfaces.
Finally, clear out space in and around the tub so you have room to work. Moving a cast iron tub takes some maneuvering, so the emptier the better.
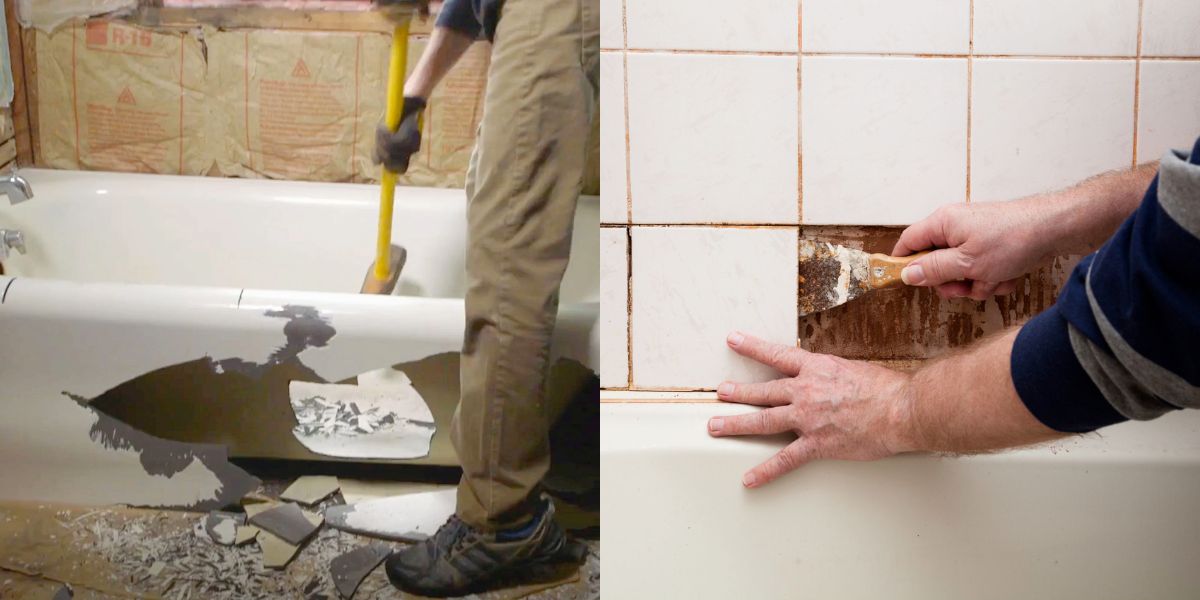
Second, Taking Out a Cast Iron Bathtub
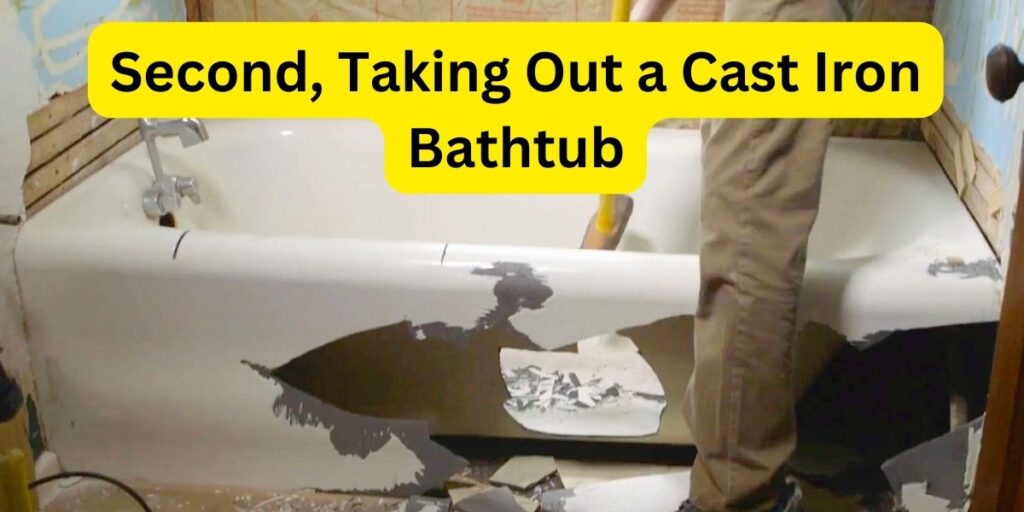
Now comes the tough part – actually getting the tub out in one piece. Have a few strong helpers on hand for this challenging step. Here are some tips to make tub removal easier:
Break Seal Around the Tub
Over years of use, the tub likely developed a sturdy seal with the floor and walls through caulking, mortar, plumber’s putty, and other adhesives. You need to break this seal completely before lifting the tub.
Start by running a utility knife around the underside and corners to slice through old caulk. Use a pry bar to separate the tub from the surrounding surfaces. Don’t be afraid to apply some muscle here – you really need to break that seal.
Remove Support Braces
Look underneath the tub for any metal brackets or wooden braces that attach to the floor joists or wall studs. These supports keep the heavy tub stable and anchored.
Unscrew the fasteners that hold the metal brackets or wooden braces in place. Detaching these support fixtures is key for getting the cast iron tub completely free.
Lift the Tub Out
Here’s where the fun begins! With a few able-bodied helpers, position yourselves around the tub and coordinate to hoist it up in unison. Take care not to crack the cast iron or injure anyone as you lift – get a good grip and use proper body mechanics.
Steadily carry the tub out of the alcove and through any doors. Have someone guide you through doorways and around corners. Bring the tub out to your loading area, whether that’s the driveway, front lawn, or a large trash receptacle.
Remove Remaining Parts
With the tub gone, you can now access the drain and plumbing lines. Finish disconnecting and removing any remaining drain pieces, piping, tub feet, or other hardware left behind.
Use a putty knife to scrape off any remaining caulk, mortar, or glue residue left on the floor and walls once the tub is out. The area should be clear before your new tub goes in.
Third and Last, Finish the Job
You’re so close to the finish line! With the messy tub removal done, just a few more steps will wrap up the job.
Clean Up Area
Thoroughly clean up the newly emptied tub alcove and surrounding bathroom. Vacuum out any dust or debris on the floors and walls. Wipe down surfaces to remove any dirt, fingerprints, or lingering adhesive.
Discard any trash or tub shards and tidy up your tools. Remove any floor or wall coverings you used to protect the space during removal.
Make Any Necessary Repairs
Inspect the freshly exposed wall studs and flooring where the tub was. Make any necessary repairs to damaged or deteriorating areas before installing the new tub.
You may need to shore up weakened floor joists, replace water-damaged boards, or refinish worn surfaces of the tub by youself. Handle any issues to get the alcove ready for a new tub.
Consider Bathtub Disposal
Now it’s time to deal with getting rid of the cast iron behemoth. Junk removal companies will haul away the broken apart pieces from your home and dispose of them properly.
If the tub is still in intact condition, consider selling it or donating it to architectural salvage stores. Hey, vintage tubs are back in style! You may even be able to recycle the cast iron material.
Otherwise, demolishing the tub yourself with a sledgehammer is an option. Just make sure to protect yourself from shards and dust.
In Summary
Removing a cast iron tub takes time, labor, and the right techniques. But with some planning and muscle, you can take out an old outdated tub to make way for an upgraded bathing experience. Just be sure to turn off the water lines, detach fixtures and braces, break the tub seal, lift it out carefully, make repairs, and dispose of the tub properly. Follow these steps and you’ll be soaking in a fresh new tub in no time!
I hope this detailed walkthrough gives you a better idea of what to expect when taking on a DIY cast iron bathtub removal project. Let me know if you have any other questions – I’m happy to share more tips from my bathtub remodeling experiences! Just remember – with the right preparation and help, you’ve totally got this. Here’s to a successful tub removal and upgraded dream bathroom!
Frequently Asked Questions
How do you get a cast iron tub out in one piece?
To remove a cast iron tub in one piece, you need to detach any fixtures like faucets, break the seal around the tub with a pry bar, remove any support braces underneath, and lift it out carefully with 2-3 strong helpers.
Can you remove a cast iron tub yourself?
Yes, you can remove a cast iron bathtub yourself but it requires physical effort and the right techniques. Have helpers ready to lift it out safely. Be sure to detach fixtures, break the seal, and remove braces first.
What tools do you need to remove a cast iron tub?
Useful tools for removing a cast iron bathtub include a pry bar, putty knives, hammer, utility knife, reciprocating saw, pliers, buckets, and a shop vacuum. Protective gear like gloves, eye protection, and a mask are also recommended.
How much does it cost to remove a cast iron tub?
If hiring a professional, expect to pay $200-$500 to remove a cast iron bathtub, depending on your location and the complexity of the job. DIY removal can cost under $100 for tools if you have helpers. Disposal fees are also an added cost.

William J. Bullock is a licensed plumber with over 15 years of experience installing and repairing bathtubs. He runs his own plumbing company in Greenville and serves residential and commercial clients. William is dedicated to providing honest, transparent advice to help homeowners make informed decisions about their bathroom renovations.
He has established expertise in selecting bathtubs, planning custom installations, diagnosing issues, and completing repairs. William aims to share practical tips and reliable recommendations based on extensive hands-on work. When he isn’t on a job site, William enjoys spending time with his family and volunteering at local community events. He takes pride in delivering quality service and enjoys helping people upgrade their homes.