Fiberglass Bathtub Installation Guide for DIY Homeowners
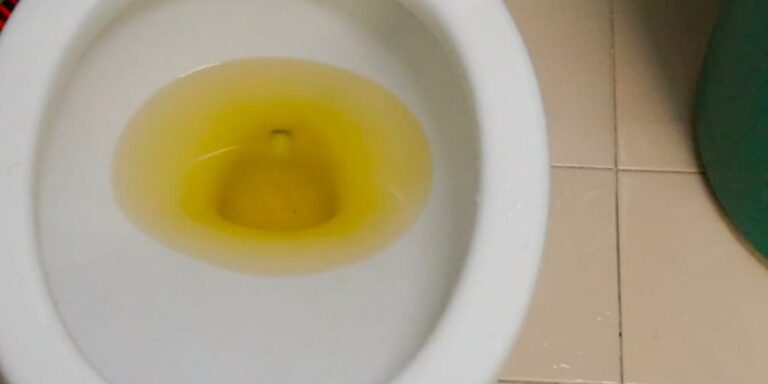
If you’re looking to upgrade your bathroom with a new bathtub, installing a fiberglass tub can be an affordable and easy DIY project. Compared to heavier cast iron or acrylic tubs, fiberglass bathtubs are lightweight and easy for one person to maneuver into place. I recently installed a new fiberglass tub in my own bathroom due to brown stains. So, let me walk you through the process step-by-step.
Installing or replacing a new bathtub requires some planning and preparation. But it can definitely be a weekend DIY job if you’re reasonably handy. In this article, I’ll share everything I learned from my own fiberglass tub installation experience. I’ll cover choosing the right tub, prepping the bathroom, fitting and sealing the new tub, adding any surrounds or accessories, and finally caulking and sealing it up.
Let’s get started!
Preparing for Fiberglass Bathtub Installation
Picking the perfect fiberglass bathtub for your bathroom layout and needs is an important first step. You’ll also need to prep the bathroom by removing old fixtures and ensuring the floor is properly leveled.
Choosing the Right Fiberglass Bathtub
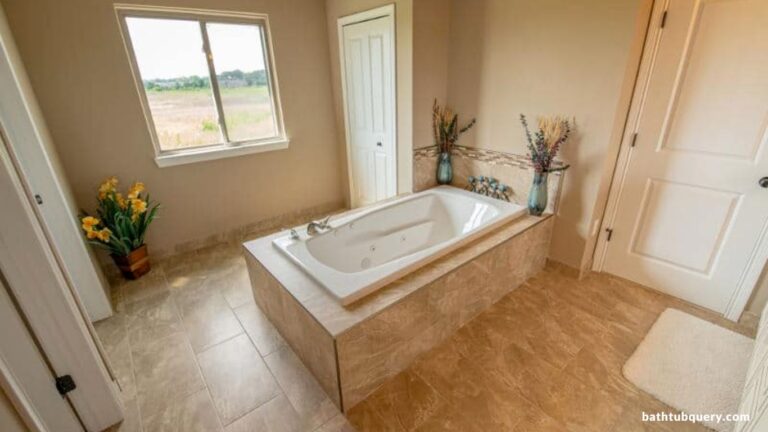
Fiberglass tubs come in a range of styles, sizes, shapes, and colors nowadays. Consider the overall dimensions that will fit your bathroom space best. Do you want a standard rectangle tub, or a corner tub to maximize floor space? What about a neo-angled or oval shaped tub for a difference look?
Most tubs are 60-72 inches long, but double check the measurements of any tub you choose. Also pay attention to the tub’s interior depth, rim height, and whether it has contoured lumbar support. These ergonomic and accessibility features really improve bathing comfort.
You’ll also want to decide on a color and finish. Glossy finishes offer a shiny, wet look but show scratches more easily. Matte finishes better hide scuffs and cleaning marks. White is the most popular color but you can also find tubs in bisque, bone, sandbar, and even black.
Other great fiberglass tub features include textured/slip-resistant bottoms, molded-in grab bars for accessibility, integrated armrests, and built-in lumbar support.
Preparing the Bathroom for Installation
Before you can put in the gorgeous new tub, the bathroom needs some demolition and preparation. Start by removing the old tub and surrounding walls or shower fixtures. Turn off the main water supply and disconnect the plumbing, including the tub drain and existing faucets.
Next, inspect the floor structure beneath the old tub. Any damaged or weak subflooring must be repaired or replaced to support the weight of a tub filled with water. You may need to add new plywood subflooring or a mortar base if the flooring is uneven.
Use a 4-foot level across the floor area to identify any low or high spots. The floor needs to be leveled to within 1/4-inch across the entire tub footprint. Once leveled, the subfloor should be strong, flat, and immobile so the tub doesn’t shift or crack when filled.
Installing the New Fiberglass Bathtub
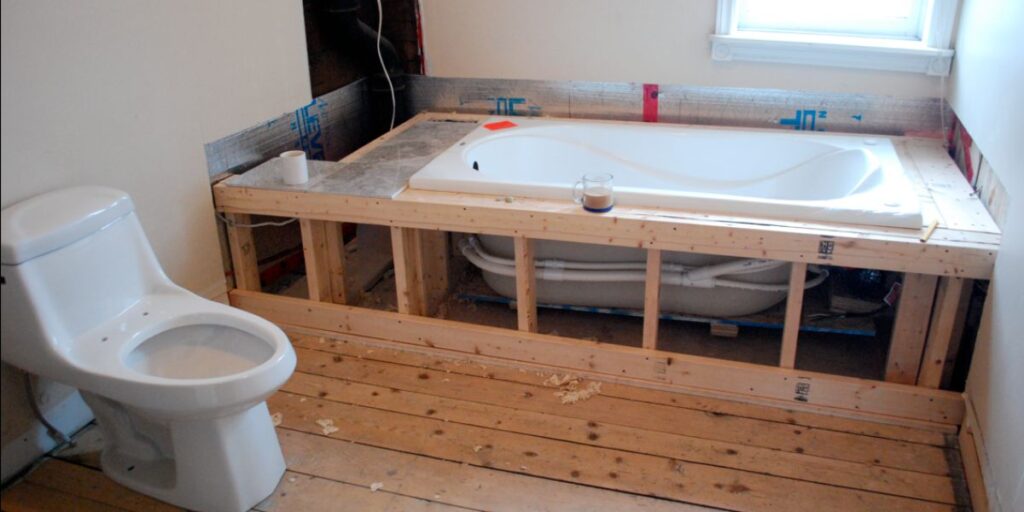
Now comes the fun part of maneuvering your new bathtub into place! Have an assistant help with the heavy lifting, and be careful not to damage the tub or surrounding walls. See also, the fiberglass bathtub replacement guide.
Fitting the Tub & Leveling It
Place the fiberglass tub where you want it installed and check that it is perfectly level. Place a level across the top rim of the tub in all directions. If needed, shim under the tub frame until the tub is completely level. Good leveling is crucial for proper draining.
Connecting the Drain & Plumbing
With the tub in position, install the drain assembly by connecting the drain pipe, P-trap, elbow, and shutoff valve according to the manufacturer’s instructions. Make sure the drain is properly leveled and aligned.
Next, connect the hot and cold water supply lines to the tub filler faucet. Turn on the main water supply and check all connections for leaks during a test run. Turn off the water supply and drain lines once more.
Sealing the Tub
Before using your new tub, it’s vital to properly seal it along all edges using a flexible silicone caulk. After cleaning the rim, apply a continuous bead of caulk along the bottom edge where the tub meets the floor. Apply another generous bead along the wall-tub seam.
Use a caulk smoothing tool or wet finger to spread the caulk into any gaps or corners. Let the caulk cure and dry for at least 24 hours before filling the tub with water. Proper sealing prevents water damage and mold growth.
Customizing and Finishing Touches
The tub installation itself is complete, but now you can add any surrounding tiles, and accessories like grab bars, and finish it off with waterproof caulking.
Tub Surround Options
Most fiberglass tubs are designed for alcove installations where they are surrounded by 3 walls. You can finish the walls with tile, fiberglass tub surround panels, or plastic tub wall kits. Surrounds should be sealed to the tub with caulk.
Tile adds a luxurious custom look, but is the most time consuming to install. Fiberglass surrounds are affordable, low maintenance, and easy to clean. Plastic tub surrounds are the quickest DIY solution, but less durable over time.
Faucets and Other Accessories
Upgrade your bathroom with a new tub filler faucet, handheld showerhead, or even tap into current trends with a rainfall showerhead for a spa-like soaking experience.
Grab bars and slip resistant texture strips can also help prevent dangerous slips and falls, especially for seniors or those with mobility issues. Get creative and make your new tub your own with fun accessories.
Caulking and Sealing
The final crucial installation step is waterproofing all joints and seams with mildew resistant caulk. After installing any surrounds, apply a smooth caulk bead where the tub meets walls, between surround seams, and along the floor.
Take your time smoothing the caulk for a neat professional finish. Always use 100% silicone caulk in bathrooms as it stands up to moisture and prevents leaks and mildew growth.
Maintenance Tips for Your New Fiberglass Tubs
Once installed properly, fiberglass bathtubs are pretty low maintenance compared to other materials. Just follow these care tips to keep your tub looking its best:
- For routine cleaning, use a soft cloth with mild liquid soap and warm water. Avoid abrasive cleaners.
- Stubborn dirt or stains can be removed with baking soda paste or a non-abrasive tub cleaner.
- Avoid placing wet products directly on the tub surface.
- To restore gloss, apply an automotive polish formulated for fiberglass.
- Small scratches can be buffed out with ultra-fine (1500+ grit) sandpaper.
I hope this overview gives you a good idea of what’s involved in installing a fiberglass tub. While it takes some work upfront, you’ll enjoy the ease of cleaning and low maintenance fiberglass provides for years to come. The whole project took me two weekends working solo. Well worth it for the gorgeous new centerpiece it adds to my bathroom!
Frequently Asked Questions
How long does it take to install a fiberglass tub?
Typically, a fiberglass tub can be installed in 1-2 days. With proper preparation and tools, an experienced DIYer should be able to handle it over a weekend. The key steps are removing the old tub, leveling the floor, fitting and sealing the new tub, installing surrounds, and caulking.
What tools do I need to install a fiberglass tub?
Common tools needed are a pry bar, hammer, reciprocating saw, adjustable wrench, channel locks, torpedo level, caulking gun, silicone caulk, shims, screwdriver, and drill. You may also need tools for subfloor repair like a circular saw, jigsaw, and plywood.
How do I level and support a fiberglass tub?
Check that the subfloor is strong, flat, and immobile. Shim the tub if needed until the top rim is perfectly level. The tub must be supported along the entire bottom – do not support the tub at the drain hole only.
What is the best way to seal a fiberglass tub?
Use a high-quality flexible silicone bathroom caulk. Generously caulk along the floor-tub seam, wall-tub seam, and any surround or plumbing fixtures. Smooth caulk with a wet finger or tool for a watertight seal.
Can I install grab bars on a fiberglass tub?
Yes, grab bars can be securely installed on fiberglass tubs by drilling pilot holes and using special grab bar mounting kits designed for fiberglass. Be careful not to crack the tub surface.
How do I cut tile for a fiberglass tub surround?
Use a wet saw to accurately cut tile. Fiberglass surrounds are easier to install but tile gives a luxurious custom look. Carefully measure and lay out tile patterns. Caulk seams with silicone.
What is the best way to clean a fiberglass bathtub?
For routine cleaning, wipe with a soft cloth and mild soap and water. Avoid abrasive cleaners. Baking soda paste removes stains. Automotive polish can restore gloss. Avoid placing wet products directly on the surface.
See more:

William J. Bullock is a licensed plumber with over 15 years of experience installing and repairing bathtubs. He runs his own plumbing company in Greenville and serves residential and commercial clients. William is dedicated to providing honest, transparent advice to help homeowners make informed decisions about their bathroom renovations.
He has established expertise in selecting bathtubs, planning custom installations, diagnosing issues, and completing repairs. William aims to share practical tips and reliable recommendations based on extensive hands-on work. When he isn’t on a job site, William enjoys spending time with his family and volunteering at local community events. He takes pride in delivering quality service and enjoys helping people upgrade their homes.