Fiberglass Bathtub Replacement Guide for Homeowners
If you’re like most homeowners, your fiberglass bathtub has probably seen better days. Over time, wear and tear can cause cracks, stains, and other unsightly damage. Replacing an old, worn-out fiberglass tub with a new one can go a long way in improving the look and functionality of your bathroom.
I recently went through the process of having my old fiberglass tub replaced, and let me tell you, it was quite the project! But in the end, the results were well worth it. My bathroom looks brand new now and I no longer have to deal with leaks or eyesores in my tub.
In this article, I’ll walk you through the steps I took to replace my fiberglass bathtub from start to finish. I’ll cover the reasons you may want to tackle a bathtub replacement, the different replacement options available, steps for removing the old tub and prepping the area, and finally how to install a new bathtub.
Let’s dive in! Here’s what I learned from replacing my fiberglass tub.
Reasons to Replace a Fiberglass Bathtub
So how do you know when it’s time to replace an aging fiberglass bathtub? Here are some of the most common signs that a replacement may be in order:
Cracks and Leaks
One of the biggest reasons to replace a fiberglass tub is if it develops cracks or leaks. Even tiny fissures in the surface can lead to water damage over time. And let me tell you, water leaking into your walls or subfloor is bad news!
If you notice puddling water, moisture, or stains around your tub, it likely means cracks have formed, and the integrity has been compromised. Replacement is really the only way to fix this issue thoroughly.
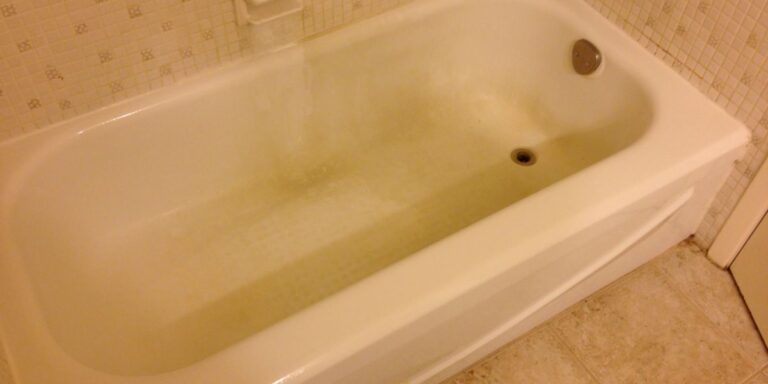
Stains and Discoloration
Over many years of use, fiberglass bathtubs can become stained and discolored. Chemicals in soaps, shampoos, and cleaners can eat away at the glossy surface, leaving behind dull, yellowed areas.
No amount of scrubbing will restore that like-new sheen if deterioration has occurred. In cases like this, replacement is the best option for an aesthetic upgrade.
Outdated Styles
Do you cringe at the sight of your outdated, avocado green or pink fiberglass tub? I feel your pain. Styles have certainly changed since the 70s and 80s when these colors were in fashion.
Replacing the tub provides an opportunity to update your bathroom to a more modern, sleek, and neutral color palette.
Damaged or Missing Parts
If the bathtub surroundings like tiles, faucets, handles, or drains are damaged or missing, replacement makes sense. You’ll be able to swap out the whole tub rather than try to Frankenstein it back together.
Improving Home Value Before Selling
Maybe you don’t hate your old tub, but you know it’s unsightly to potential homebuyers. Replacing it before listing your home can help make the bathroom look bright, shiny, and updated. This small reno project could pay off nicely in the home’s resale value.
Options for Replacing a Fiberglass Bathtub
Once you decide to take the plunge with a bathtub replacement, you’ll have to choose what type of tub to swap in. Here are some of the most common options along with the pros and cons of each:
New Fiberglass Bathtub
Going with a fresh new fiberglass tub is one option. Fiberglass is affordable and lightweight. It’s also easy for contractors to maneuver into place.
The downside is that fiberglass scratches and stains fairly easily. The glossy surface requires gentle cleaning and care.
Acrylic Bathtub
For a material that’s more durable than fiberglass, acrylic is a great choice. It resists scratches and has a smoother, glossier appearance. Acrylic is easy to clean and maintain. It’s also available in a wide range of colors.
On the downside, acrylic tubs are more expensive than fiberglass. The material is also prone to chipping if hit at certain angles.
Cast Iron Bathtub
You can’t beat cast iron tubs for durability. Cast iron has a porcelain enamel coating that holds up well to bumps and bangs. Built to last for decades, these tubs have a timeless, classic look.
Keep in mind that cast iron is extremely heavy, weighing over 200 pounds in some cases! And the vintage look may not be right for all bathroom styles.
Porcelain Enamel Steel Bathtub
For shiny porcelain aesthetics minus the weight of cast iron, steel tubs with a baked-on porcelain enamel finish are a lighter option. This material provides a scratch and stain resistant surface that looks freshly painted for years.
One downside is that the porcelain may chip if hit hard enough. Prices are also in the higher range.
Solid Surface Bathtub
If customization is important, solid surface tubs like Corian or Swanstone allow for seamless installation within countertops and walls. This creates a sleek, contemporary look. Solid surface materials are durable, scratch-resistant, and easy to clean.
On the downside, colors are limited to neutral hues. Solid surface tubs are also on the pricier end.
As you can see, there are plenty of options to consider when selecting a replacement bathtub. Keep in mind your overall bathroom style, needs for durability, and budget. This will help narrow down which material is right for your home.
Now let’s get into the nitty gritty of the tub replacement process!
Steps for Removing an Old Fiberglass Bathtub
Taking out an old fiberglass tub isn’t the most glamorous job, but it’s a necessary step. Here is a rundown of the process I followed:
Turn Off Water Supply and Drain Pipes
Safety first! Turn off the hot and cold water valves supplying the tub. This ensures you don’t get an unwanted soaking. Also, plug the drain and trip the tub’s overflow lever. This keeps any residual water contained.
Remove Caulk and Accessories Like Faucets
It’s time to clear away anything attached to the old tub. Scrape off old caulk around the perimeter. Remove the faucet handles and spout. Take off any railings or grab bars as well. This frees up the tub for removal.
Cut Away Drywall Around the Tub
Most fiberglass tubs are surrounded by drywall and tiles. Carefully cut away materials around the sides and front with a utility knife or oscillating tool. Watch out for any wiring or pipes behind walls.
Disconnect and Remove Drain Pipes
Under the tub, disconnect the drain pipes from the drain assembly. You’ll need to take apart the P-trap, slip fittings, washers, and tailpiece. Set aside components to reuse or replace later.
Break Tub Into Removable Pieces
The tub likely won’t budge in one intact piece. Using a sledgehammer, break up the fiberglass into manageable sections. Wear safety goggles and gloves during this step to protect yourself.
Remove Tub Pieces and Dispose
With the tub broken up, you can start carefully carrying sections out of the bathroom. Having an extra set of hands helps here. Discard the pieces in a dumpster or haul them away to the landfill.
And voila, the old tub is outta there! Now the fun part…prepping for a new tub.
Preparing the Area for a New Bathtub
Before installing a new bathtub, the area needs some TLC. Here are the steps I followed to get my bathroom ready:
Inspect and Repair Subfloor if Needed
With the old tub out, examine the subfloor for any water damage or rotted areas. Use a level to check for flatness. Make repairs as needed to provide a solid foundation.
Install New Drain Pipes and Plumbing to Fit New Tub
Most new tubs require new drain assemblies and pipes. Measure and purchase components that align with the tub model. Install the new drain system according to manufacturer instructions.
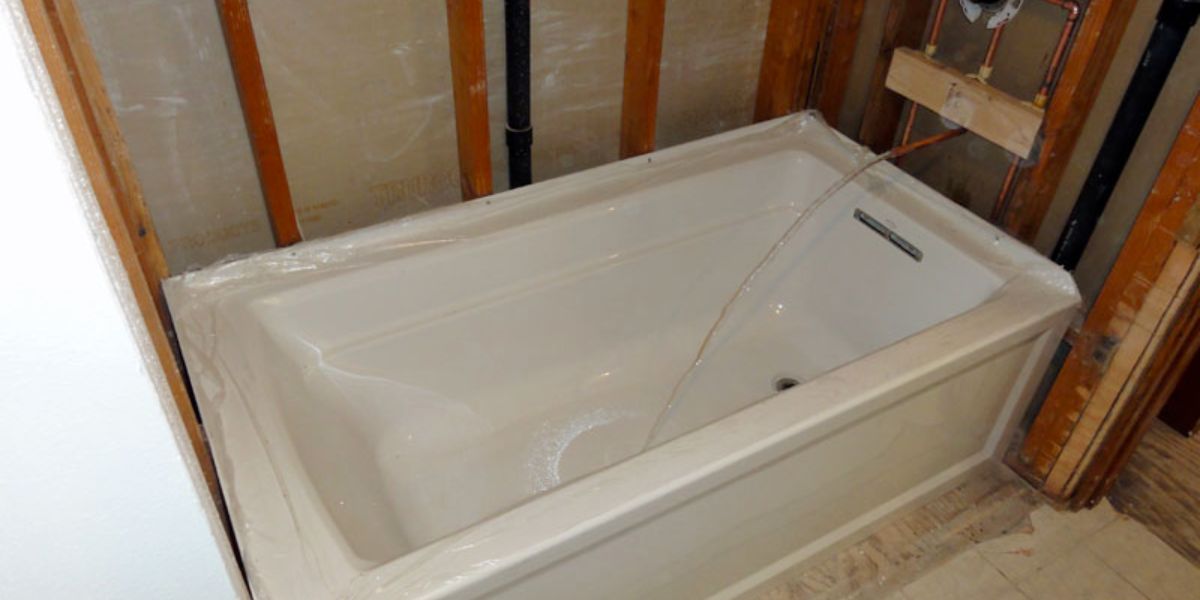
Build Out Framing to Fit New Tub Size
Surround the three-walled tub alcove with additional stud framing if needed. This provides added support and creates a niche if the new tub is a different size.
Once the plumbing is repaired and framework installed, it’s go time for the new tub!
Installing the New Bathtub
Carefully installing the replacement tub is key to getting a leak-free, finished look. Here are the steps I followed:
Test Fit Tub and Make Any Adjustments
Sit the new bathtub in place temporarily to test the fit. Check for levelness and look for any gaps around the edges. Add shims or make small modifications if needed.
Apply Adhesive Sealant if Needed
For extra protection from leaks, run a bead of adhesive sealant around the rim area that will touch the tub deck and walls. This seals things up nicely.
Carefully Set Tub in Place
Now for the heavy lifting! With a helper, lift up the tub and gently lower it into the alcove. Try to avoid banging the tub sides. Get it centered and lined up evenly.
Connect Drain Pipes and Plumbing
Attach the drain assembly and P-trap according to directions. Make sure the drain sit level with the tub bottom. Reconnect the hot and cold water supply lines.
Seal Edges with Caulk
Once the tub is settled in, seal up the perimeter edges with a flexible, waterproof caulk. Smooth it into any crevices. Let it fully cure.
Reinstall Fixtures and Accessories
The finishing touches – attach the faucet, handles, showerhead, and any other hardware like grab bars. Make sure sprayers and faucets function properly.
Surround with Walls and Install Tub Surround
Close up the open wall areas with moisture-resistant drywall or cement board. Apply tile, fiberglass panels, or another tub surround material.
And that’s a wrap! After all that demolition and reconstruction, take a nice long soak in your swanky new tub!
Replacing a worn-out fiberglass bathtub takes time and elbow grease. But in my experience, it was worth the effort. The difference a fresh new tub makes is amazing. No more leaks or unsightly scratches and stains. Just a pristine, functional bathtub primed for years of use.
I hope this guide gives you a better idea of what to expect with a fiberglass bathtub replacement project. Let me know if you have any other questions! I’m happy to provide tips and advice from my experience. That cracked, outdated tub won’t replace itself. But armed with the right information, you can tackle this project and revitalize your bathroom.
See more:
- How to Remove Brown Stains from a Fiberglass Bathtub?
- Can a Fiberglass Bathtub Be Repaired?
- Which is Better: Fiberglass or Steel Bathtub?

William J. Bullock is a licensed plumber with over 15 years of experience installing and repairing bathtubs. He runs his own plumbing company in Greenville and serves residential and commercial clients. William is dedicated to providing honest, transparent advice to help homeowners make informed decisions about their bathroom renovations.
He has established expertise in selecting bathtubs, planning custom installations, diagnosing issues, and completing repairs. William aims to share practical tips and reliable recommendations based on extensive hands-on work. When he isn’t on a job site, William enjoys spending time with his family and volunteering at local community events. He takes pride in delivering quality service and enjoys helping people upgrade their homes.