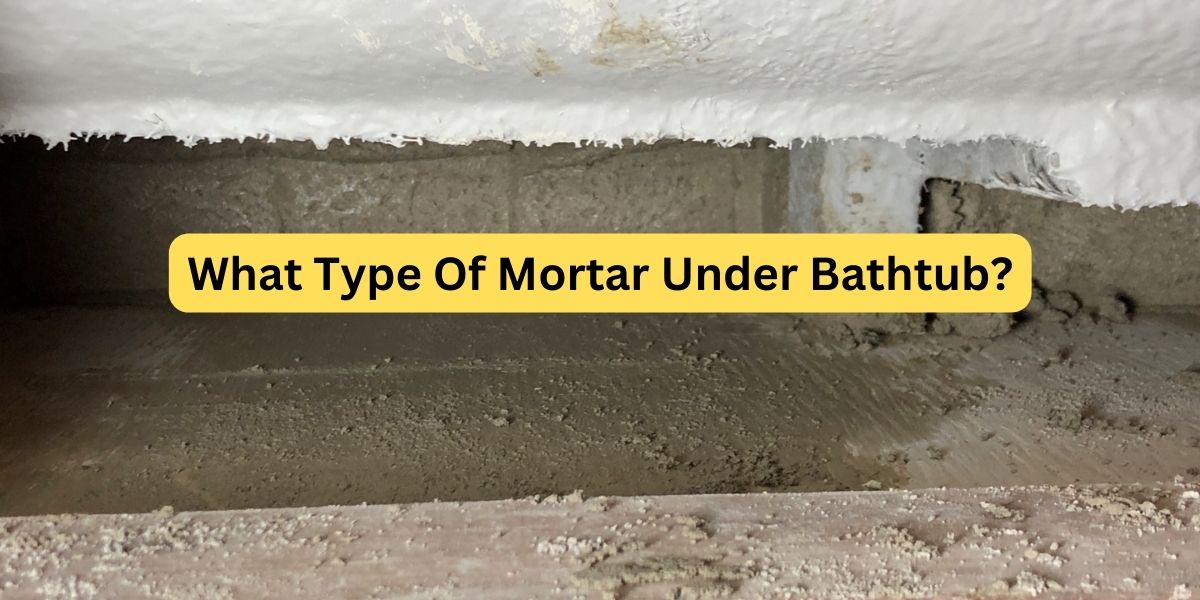
What Type Of Mortar Is Under The Bathtub?
When I renovated my home’s main bathroom last year, choosing the right mortar was crucial to get that luxurious soaking tub I’d always wanted installed properly. With so many mortar products out there though, it can get confusing to figure out which type of mortar is ideal for your specific bathtub material and installation needs.
That’s why I did tons of research to understand what mortar properties I should look for based on my acrylic tub and my bathroom’s particular subfloor situation. Don’t make the same mistakes I almost did – read on for the complete low-down on picking the perfect mortar for under your bathtub!
For bathtub installation, either thinset mortar or floor leveling compound works well. Placing strategic piles of mortar is often easier to control than a full mortar bed. The piles provide comparable support and stability for the tub while using less material. Both mortar types bond the tub firmly when applied correctly.
Consider These Factors When Choosing Mortar
The type of bathtub you select should be the first factor that helps guide your mortar choice. Mortar needs to support the tub material properly and bond correctly to its surface texture. Lightweight acrylic and fiberglass tubs need more flexibility, for instance, while heavy cast iron requires maximum strength.
The mortar thickness and installation method, either a full mortar bed or just thinset, also depends on the tub backing. Get the match wrong, and you could end up with cracks or even a loose, shifting tub over time. Making sure your mortar has the right properties prevents problems down the road.
Bathtub Material
The material your bathtub is constructed from matters greatly when it comes to the right mortar selection. Each common tub type – acrylic, fiberglass, porcelain, cast iron, and stone resin – has unique physical properties and backing that require the mortar to provide different levels of support, flexibility, and adhesion.
For softer bathtub materials like acrylic and fiberglass, you’ll need a mortar that adds some flexibility so the tub can flex slightly without cracking the mortar. These tubs also require excellent adhesion to bond firmly to the tub surface. Pre-mixed lightweight polymer-modified mortars are ideal for these modern tub materials.
On the other hand, cast iron and stone resin tubs are heavy, rigid, and prone to shifting if the mortar underneath doesn’t provide maximum strength and durability. For these tubs, a thicker mortar bed of sand-cement blend is recommended to prevent the heavy tub from cracking softer mortar over time.
Porcelain enamel tubs can usually use lightweight or regular mortar blends since their surface is hard and less prone to flexing. Always check your specific tub model’s installation guide for the manufacturer’s mortar recommendations too. Picking a mortar designed for your type of bathtub prevents installation problems or even hazards like collapsing mortar.
Mortar Bed vs. Thinset
Depending on your bathtub style, you may be able to use a thin layer of mortar called thinset rather than a full 2-3 inch mortar bed. Thinset is quicker and uses less material, but it provides less support overall compared to a mortar bed.
Bathtubs with a sturdy, continuous, and level solid surface backing can safely be installed over thinset. For tubs with feet, uneven bottoms, or softer backing, a full mortar bed is the better option to evenly distribute the tub’s weight and prevent settling cracks. Stone resin and cast iron tubs in particular should always be installed over true mortar beds, while acrylic and fiberglass models usually require just thinset as long as they have rigid backing panels.
I made the mistake of using thinset under my free-standing acrylic tub thinking it would be easier. But without the solid support of a mortar bed, it started creaking and shifting almost right away. I had to rip it out and re-install it with the proper flexible lightweight mortar bed blend reinforced with polymer additives. Don’t make my same painful error – choose thinset or mortar correctly from the start!
Waterproofing Needs
Since bathtubs hold water constantly, moisture seeping through mortar into subfloor materials is a huge hazard that can cause extensive rot and mold damage over time. Some mortar blends come pre-mixed with latex polymer additives that help create a more impenetrable water barrier compared to plain cement-based mortars.
For any mortar bed, I strongly recommend using a latex-modified blend for crucial waterproofing, especially under acrylic and fiberglass tubs where moisture could infiltrate more easily. The latex makes the mortar more flexible as well. If you use plain mortar, coat it with a waterproof membrane to seal the bed entirely before setting the tub.
Don’t learn this lesson the hard way like me – make sure your mortar choice properly waterproofs and seals the area under the tub from the start! My first mortar bed cracked over time, allowing leaks that caused smelly damage. Replacing that section of the subfloor was a nightmare. With acrylic tubs, take zero chances – always use latex-modified or otherwise waterproofed mortar.
Recommended Types For Best Mortar For Bathtub
Now that you know what mortar properties to look for based on your tub type and installation method, let’s review some of the best mortar product options for specific bathtub materials. I’ll share which mortar blends worked wonders when I installed my acrylic tub.
Acrylic and Fiberglass Bathtubs
For lightweight acrylic and fiberglass tubs, you need a flexible, polymer-modified, and lightweight mortar designed especially for these materials. The mortar needs to allow slight movement without cracking while firmly bonding to the smooth tub surface.
The pre-mixed lightweight polymer-modified mortars made by reputable brands like Mapei and CCS are perfect for acrylic and fiberglass tubs installed over a mortar bed or thinset layer. These mortars contain polymers or latex that make them highly flexible and waterproof while still offering firm support. The lightweight mineral blends provide excellent adhesion without being prone to cracking.
I used Mapei’s UltraLight premium lightweight mortar with polymers for my acrylic tub install and it worked brilliantly. It flexed with the tub’s slight movements and sealed out moisture completely. For acrylic and fiberglass, stick with polymers and lightweight!
Cast Iron Bathtubs
Under heavy cast iron tubs, you need a mortar with seriously strong compressive strength so it doesn’t get crushed, causing the tub above to crack or shift. Sand-cement mortar beds are ideal for these cast iron behemoths!
A sand-cement blend, ideally with some latex polymer added for increased strength and waterproofing, provides the ultra-strong support and stability cast iron demands. You can mix this mortar blend on-site to save costs. Go for at least a 2-1 ratio of sand to cement for durable strength.
I don’t recommend lightweight mortars under cast iron tubs – always opt for sand-cement, the stronger the better! My parents restored a lovely old clawfoot cast iron tub, and their contractor used a hardcore 5:1 sand-to-cement mortar bed that has held up beautifully for over 15 years now. Don’t risk lightweight stuff under hundreds of pounds of cast iron!
Freestanding Bathtubs
For trendy freestanding tubs, whether acrylic, fiberglass, or even cast iron, thinset rather than a full mortar bed is often recommended for easier leveling. Freestanding tubs aren’t surrounded by wall studs holding them in place, so they can shift gradually.
With thinset, it’s easier to adjust the tub to get it perfectly level during installation. Premium modified thinsets with some flexibility, like Mapei’s Ultraflex LFT, are ideal for freestanding tubs. They allow that touch of “give” while still bonding tenaciously to the tub bottom.
If your freestanding tub will hold more than 80 gallons or weigh over 200 pounds, I’d recommend upgrading to a lightweight mortar bed for added support. This helps prevent shifting over time as you climb in and out. Get the versatility of thinset with the strength of mortar for worry-free freestanding tub support.
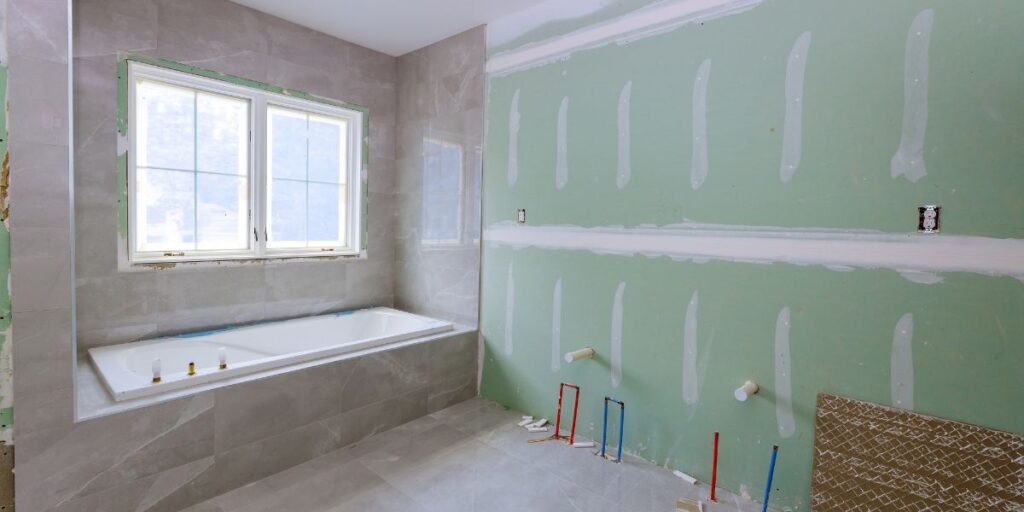
How To Install Mortar?
Now that you’ve got the right mortar products on hand for your tub installation, proper installation technique is critical for creating a supportive, level, long-lasting mortar base. Follow these tips when prepping the area, mixing and applying mortar, and finishing the job.
Surface Preparation
They say proper surface prep is 90% of a successful mortar job – so true with bathtub mortar beds! Start by ensuring the subfloor is immaculately clean. Scrape up old thinset chunks or adhesives and vacuum up every speck of dust.
Check the subfloor is structurally sound, level, and stable with minimal flex. Address any issues like loose boards or gaps before applying mortar.
Prime surfaces like concrete before mortaring. And don’t apply mortar over raw plywood – use a waterproof underlayment like Schluter Kerdi.
Finally, mark stud locations under the tub area. Mortar needs support brackets anchored into the studs to prevent sagging or cracking.
Mortar Consistency
Mix up mortar bags carefully following the manufacturer’s directions. You want a moist, workable consistency that retains its shape but spreads readily under the tub without crumbling.
Don’t mix too wet or dry! Test a ball of mortar – it should hold shape but also stick without cracking when flattened into a pancake. Adjust water or polymer additive amounts to achieve that perfect creamy mortar texture.
Let the mortar slake for 5-10 minutes after initial mixing. Then give it a final quick stir before use.
Curing Time
It’s tough to wait days before the fun part of lowering your fancy new tub into place, but mortar needs proper curing time. Lightweight polymer-modified mortar beds take about 48-72 hours to cure fully.
Don’t rush or you’ll risk damaging the mortar! Cure times allow complete evaporation of moisture and full hardening.
Protect fresh mortar from drafts, heat, or freezing while curing using insulation blankets. And don’t walk on it or otherwise apply weight before it’s fully cured. Patience pays off!
Sealing the Tub
Before enjoying a soothing soak in your tub, seal its edges thoroughly with a premium waterproof silicone caulk. This protects moisture from getting under the tub into mortar or subfloor.
Take your time applying a smooth, continuous caulk bead that fully seals the tub edge to the surrounding surfaces. Use a backer rod for larger gaps.
Let the caulk cure fully – up to 48 hours for 100% silicone. Soft or uncured caulk allows moisture intrusion or leaks.
Common Queries About Mortar:
Do you need mortar under the bathtub?
Yes, mortar is crucial under bathtubs to create a strong, waterproof base that bonds to the tub and prevents cracking or shifting. Mortar evenly distributes weight and anchors the tub in place.
What is the alternative to mortar under the bathtub?
Lightweight concrete backerboard can substitute for mortar under acrylic and fiberglass tubs but provides less support overall. Use backerboard reinforcements.
Do acrylic tubs need a mortar bed?
Acrylic tubs require flexible mortar or thinset with polymer additives to allow slight movement without cracking the mortar. Lightweight mortar beds work well.
Do I need mortar under the steel tub?
Yes, mortar is recommended under steel tubs for proper support and waterproofing. Use a strong sand-cement blend to support heavy weight without crumbling over time.
Closing Thoughts
I hope this overview gives you the confidence to choose the ideal mortar for your bathtub installation project. Matching mortar properties to your specific tub type and needs prevents so many headaches down the road.
Spending a bit more on advanced lightweight, polymer-modified mortar is worth avoiding leaks or cracks. With the right mortar choice and careful installation, you’ll enjoy a solid, stable bathtub foundation that lasts for decades of relaxing soaks!
If you’re tackling a bathtub installation soon, let me know if you have any other questions about mortar products and techniques. I’m happy to share more details from my experiences renovating bathrooms to help you get it right the first time! Proper mortar under your bathtub provides peace of mind and safety for your family to enjoy a soothing bath for years to come.

William J. Bullock is a licensed plumber with over 15 years of experience installing and repairing bathtubs. He runs his own plumbing company in Greenville and serves residential and commercial clients. William is dedicated to providing honest, transparent advice to help homeowners make informed decisions about their bathroom renovations.
He has established expertise in selecting bathtubs, planning custom installations, diagnosing issues, and completing repairs. William aims to share practical tips and reliable recommendations based on extensive hands-on work. When he isn’t on a job site, William enjoys spending time with his family and volunteering at local community events. He takes pride in delivering quality service and enjoys helping people upgrade their homes.